Fit settled, procedure not
Installing a boot or a breakout
Two published shrink temperatures, 125°C and 120°C, and two different places to put the heat first.
No installation sheet is published for either part
Every boot and breakout sheet in this pack publishes three usable things. A shrink temperature. A bore pair against each size code. And, on four of the boot sheets, the line that the part goes on over a connector already mounted to the cable. No heat source is named. No sequence is numbered. What follows is Branch Point's reconstruction from those figures. Each step says where the reasoning is ours rather than the manufacturer's, and a leaflet supplied with the part overrides all of it.
Two temperatures on one job, and neither is a dial setting
The crutch parts and the termination-box boots recover at 125°C: Insulcore-LV, the non-tracking GAB series, the semi-conductive GCB series, and the GRB and GSB boots. The harness range recovers at 120°C: GHSB, GHRB, GHYB, GHS2-N and GHS3-N. Both figures describe the temperature the wall has to reach through its thickness, measured in the material and not at the source. Where a job carries both, the higher one sets the pace.
The larger numbers on the same sheets are survival results and not permissions. A GHS2-N boot is held at 200°C for four hours and inspected for dripping, flowing and cracking under UL 224. The breakouts are held at 250°C for thirty minutes under ESI 09-11, the straight and right-angle boots under ASTM D2671. A sample that comes out of an oven intact is not a licence to take a fitted part to 250°C on a cable.
The breakout charts also publish two wall figures against every size, each at ±10 per cent: Tb for the body and Tc for the legs. The body is the thicker of the two on almost every row — 3.3mm against 2.7mm on LV3GBB-0820, 3.7mm against 2.6mm on LV4GBB-1334. Heat time follows wall thickness, so the body is nowhere near finished at the moment the legs look done.
Count the bonds before you clean anything
A straight boot asks its lining to bond to a connector shell and one cable jacket. A seven-core breakout asks the same lining to bond to the sheath and to seven separate core surfaces. The IP68 claim on that assembly is only as good as the weakest of those eight bonds. Insulcore-LV is lined with hot melt adhesive. GAB, GCB, GRB and GSB are lined with water-resistant mastic, printed red on the semi-conductive breakout and on both moulded boots.
Neither lining bonds through a film. Whatever sits on a core when the part comes down is what the lining bonds to instead. Impregnating compound wiped off a paper core, grease from a hand, trench dust on a new jacket: each one is now the joint. The kits that carry these breakouts ship cleaning solvent and cleaning tissue as itemised aids. They also ship an aloxite emery tape, published for lifting semi-conducting residue off insulation. Abrading a jacket to key it is ordinary practice here rather than a printed instruction. Solvent goes on last and has to flash off before any heat arrives.
Eight moves, and the two places the shapes stop sharing a method
Steps 4 and 7 are where a heat-shrink breakout, a heat-shrink boot and a cold shrink part diverge. Everything either side of them is common.
Read the pair, not the size
Every chart row gives the bore twice. Breakouts label the two columns s and f, as supplied and after free recovery; boots label them a and b. The first figure has to clear what the part travels over, the second has to sit under what it closes onto. LV3GBB-0820 opens at s 60mm and comes down to f 20mm on the body, s 25mm to f 8mm on each leg. A core measuring 6mm sits under the leg's recovered bore and will never be gripped at all. The full sets are on the breakout size chart and the boot size chart.
Dry-fit cold, and mark the recovered length
Slide the part on with no heat anywhere near it. Set the fork of a breakout on the crutch and check that every leg reaches past the point you need covered. Then mark for the recovered length rather than the cold one. LV3GBB-0820 publishes a body of 160mm as supplied and 184mm after free recovery, with legs going 45mm to 60mm. The part covers more of the cable after it closes, not less.
Clean past that mark on every surface
Clean each core over its full recovered leg length and the sheath over the full recovered body length, then a little beyond both. This is the step that decides the IP68 result and the only one that leaves no evidence afterwards. Let the solvent go off completely before the heat comes out.
Start where the wall is thickest
On a breakout that is the body sitting over the crutch. Bring the fork up to temperature first. Then work outward in both directions, down the body onto the sheath and out along each leg. Air and softened lining travel ahead of the recovery front towards an open edge. Drive them the other way and they collect in the fork, which is the one place you cannot reach again. On a boot the heat starts at the shell end, which has to seat first, and runs down to the cable tail. That tail is the only opening the air has. Both of those are our reading of the geometry, and neither sheet states a starting point.
Count the edges, then count the beads
Lining pushed out and standing proud, unbroken, at every open edge is the finish signal. Count the edges before you start: a boot has two, a three-core breakout has four, a seven-core breakout has eight. Seven beads out of eight is a leak. A part that is tight everywhere and beaded nowhere never took its lining to melt, and no external check afterwards will separate the two.
The clip goes in before the sleeve
A branch-off clip is not something you add to a finished joint. Its hot melt lining is published as melting simultaneously with the outer sleeve's shrinkage, so the clip and the sleeve are one heating operation. Seat GBOC 1, 2 or 3 between the two cores, bring the sleeve over it, then heat. The three sizes run P 64mm, 110mm and 125mm with every dimension held to ±5 per cent, on the manufacturer's branch off clip page. Once that sleeve has closed there is no way back in.
Cold shrink: position first, then withdraw
GCEB2 and GCEB4 arrive factory-expanded on a removable core and need no torch and no tools. Position the body over the crutch with the core still inside it. Check that each finger sits on its own core. Only then pull the core out. The sleeve closes as the core leaves, and there is no second attempt: nothing was heated, so nothing can be softened again. GCEB2-1 has a body bore of 47mm minimum against an application range of Ø17 to Ø30. Its fingers are 20mm minimum and close onto Ø10 to Ø14.
Nothing loads it until it has gone cold
A boot is sold as a strain-relief part, so the first load it ever sees is the harness being dressed behind it. Hold that back until the moulding has gone cold. Lining that is still soft lets a good bead slide out of position, and the part looks identical either way.
Two of the harness boots come with no lining at all
GHS2-N and GHS3-N are published as supplied with or without adhesive lining. On the unlined version there is no bead, so step 5 has nothing to read. What you check instead is profile: the throat closed down on the cable and each branch leg following its core rather than standing off it. Ask for the lined version wherever the branch has to seal and not only insulate. Neither sheet states which one ships by default.
What a closed cold shrink breakout looks like
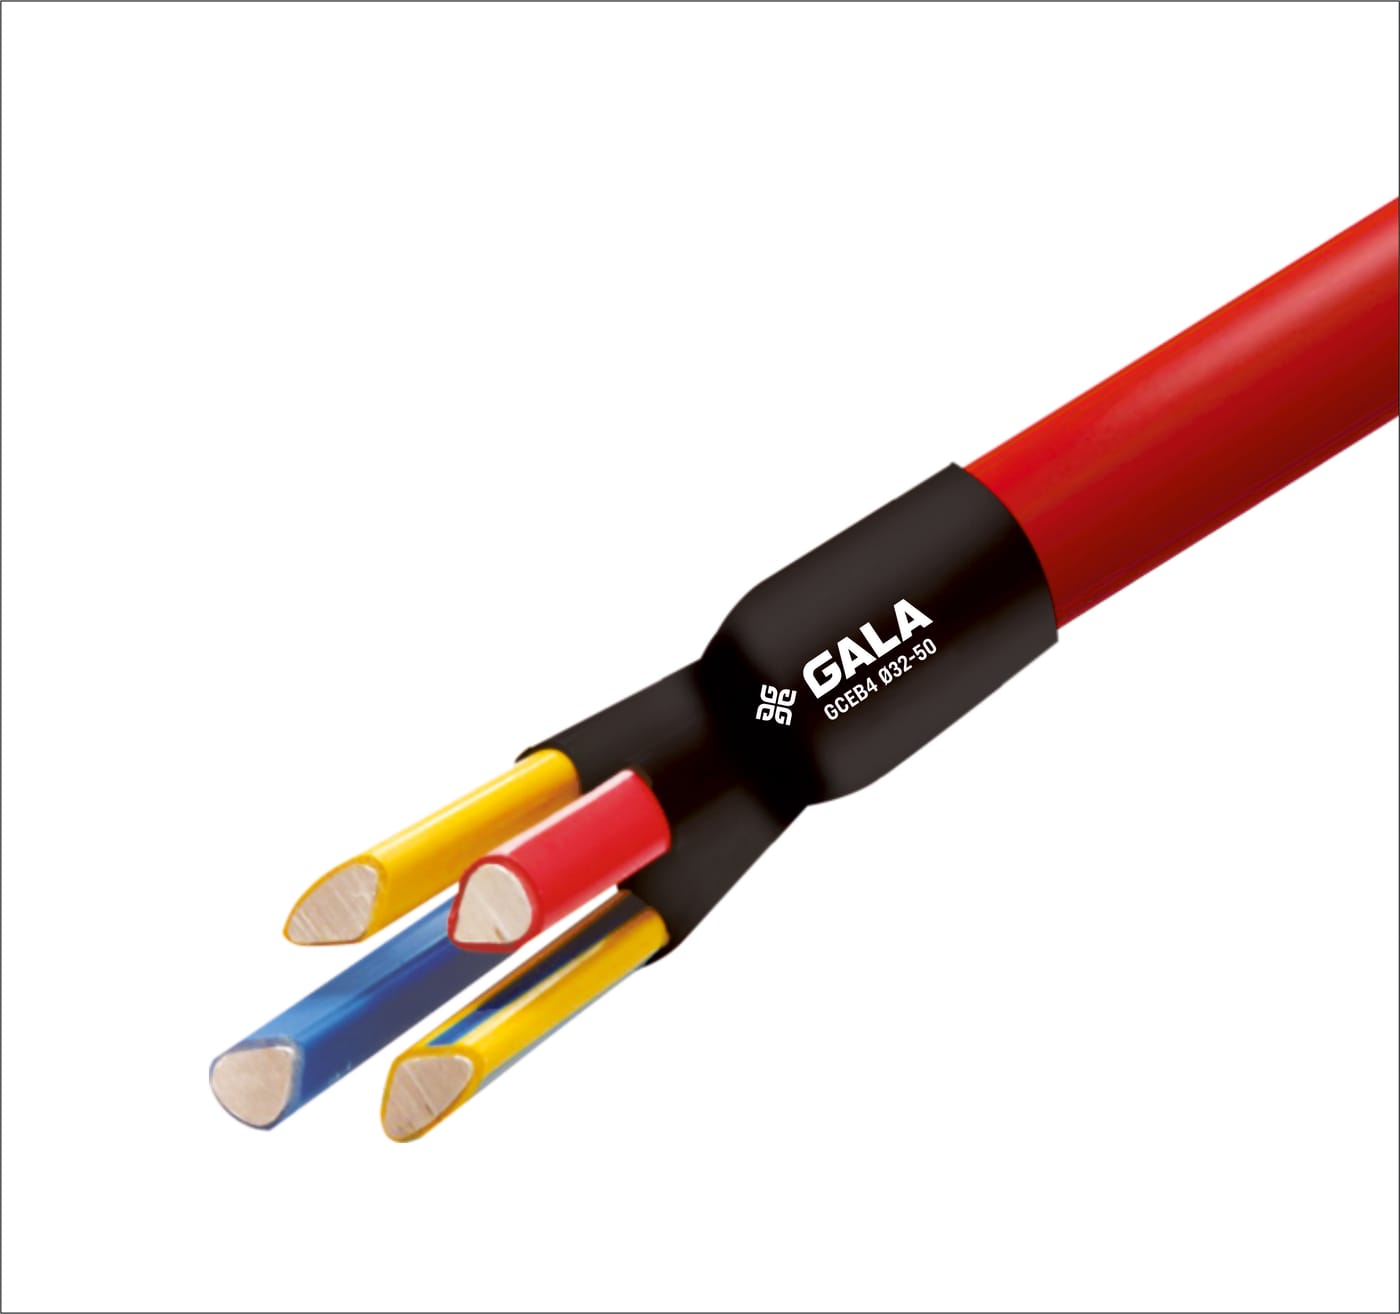
The manufacturer's image of a recovered four-way part shows the body closed onto the red sheath and each finger closed onto a sector-shaped core. The code GCEB4 Ø32-50 is printed on the body beside the brand mark.
Read that printed band before you position the part. It gives the range this one was built to close onto. It is also the last check available: once the core is out, nothing about the fit can be revisited.
What this sequence does not settle
Five limits, stated as limits.
- It does not apply to the reusable rubber boot. GRRB-1 is stretched over the bushing and comes off again. Nothing on it recovers and no shrink temperature is published for it; the entry diameters are on the reusable boot page.
- It is not a work method. Isolation, earthing, the permit and any hot-work approval all exist before step 1. They belong to whoever owns the plant.
- It does not rescue a size taken off conductor area. A breakout is chosen on the cable diameter at the crutch and one core diameter past it. Both charts run on millimetres.
- It does not cover the joint or termination kit around the breakout. Those ship an instruction manual written against one kit code. That manual governs the breakout inside it.
- It does not make a recovered part removable. The lining has set behind the recovery front, so a fitted boot or breakout comes off by cutting. Where the number has already gone, replacing one from the part itself is the starting point.
Asked on site
Why do the two parts in front of me shrink at different temperatures?
What heat source does the manufacturer specify?
Do I have to disconnect the connector before fitting a boot?
The part is tight but nothing came out of the edges.
Can a cold shrink breakout be repositioned after the core is out?
Say whether a flame is allowed before you ask for a size
That single fact decides between a 125°C heat-shrink crutch part and a GCEB cold shrink one, and cold shrink is catalogued only at 2 and 4 core. Add the core count, the two diameters and whether the joint is already made up, and a size code comes back in one reply.